Learn how to download and install the distributed version control system ” Git “. With ” Git “, You can manage the source code of the program. By recording the edit history of the document, you can prevent accidentally overwriting with the old version, and you can restore the file to the past state.
table of contents
1. Download Git for windows
2. Install Git for windows
2.1. Check Git license
2.2. Select Git installation folder
2.3. Select component
2.4. Create a Git shotcut in the Start menu
2.5. Set Windows environment variables
2.6. Set line feed options
2.7. Set Git Bash
2.8 . Git Other Settings
2.9. Difftool Settings
1. Download Git for windows
This time, install Git on Windows (64bit) OS . Now , let’s download ” Git ” immediately. Open the Git download page ( https://git-scm.com/downloads )and click ” Downloads for windows ” in the monitor image on the right. 64-bit.exe) “can be downloaded. You can also download the “Windows 64bit version” Git installer by clicking the ” Windows ” link under ” Downloads ” on the left .
* If you are using an OS other than Windows, click the link according to the OS and download the Git installation file.
● Browser display (Download)
Save the installation file
If you want to install the 32bit version of Windows OS, click “Windows” from “Downloads” to move to the “Downloading Git” page. From the “Other Git for Windows downloads” list, click ” 32bit Git for Windows Setup “. Click the “” link to download the installation file. The save location does not matter.
● Browser display (Downloading Git)
2. Install Git for windows
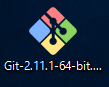
Double-click the installation file ( Git-2.11.1-64-bit.exe ) downloaded from the official Git website to start the installation.
● Git-2.11.1-64-bit.exe
2.1. Confirming the “Git” license
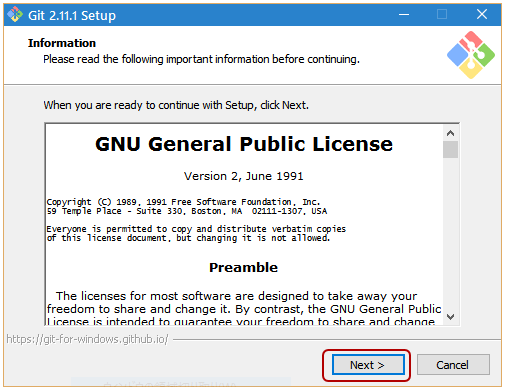
First, a window to confirm the Git license will be displayed. After confirming the contents, click the ” Next ” button.
● Git 2.11.1 setup (Information)
2.2. Select “Git” installation folder
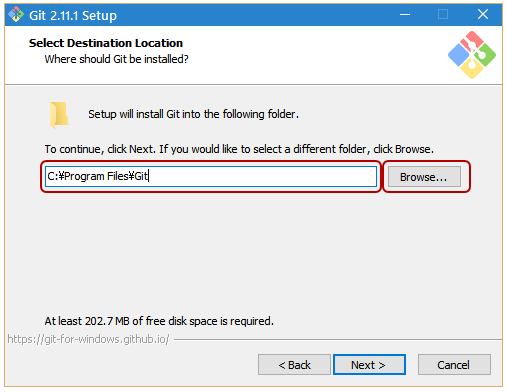
Then select the folder where you want to install Git . Unless otherwise specified, just click the ” Next ” button.
● Git 2.11.1 setup (Select Destination Location)
2.3. Component selection
In Select Components, select the Git installation specifications. Please refer to the following and check it according to your preference.
● Additional Icons-O
n the Desktop:
Put a shortcut to launch Git Bash on your desktop
● Windows Explorer Integration:
Settings related to the context menu when right-clicking. If you check it, you can use ” Git Bush ” and ” Git GUI ” from the context menu.
● Associate .git * configration files with the default text editor: Associate
(open) configuration files starting with “.git” with the default text editor
● Associate .sh files to be run with Bash:
Make “.sh” files run in Git Bash
● Use a TrueType font in all console windows: Use
”TrueType fonts” in console windows.
* Japanese characters are garbled, so it is better not to check.
● Git 2.11.1 setup (Select Components)
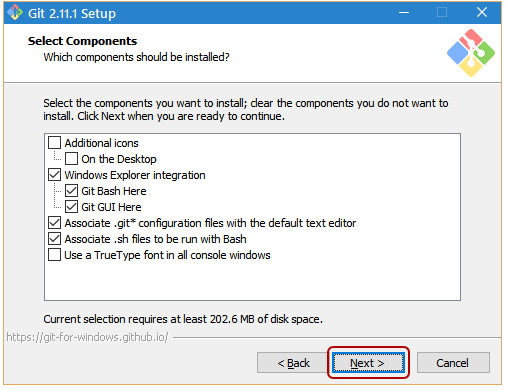
After selecting the component, click the Next button to continue.
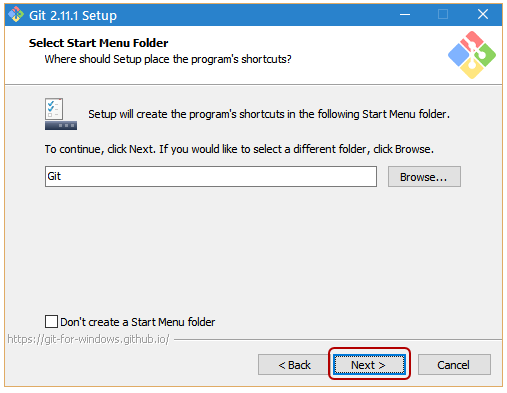
2.4. Create a Git shotcut in the Start menu
Create a shortcut in the start menu. If you like the ” Git ” folder in the menu, just click the ” Next ” button to proceed.
If you do not need to create a shortcut , check ” Don’t create Start Menu folder ” and click the ” Next ” button.
● Git 2.11.1 setup (Select Start Menu Folder)
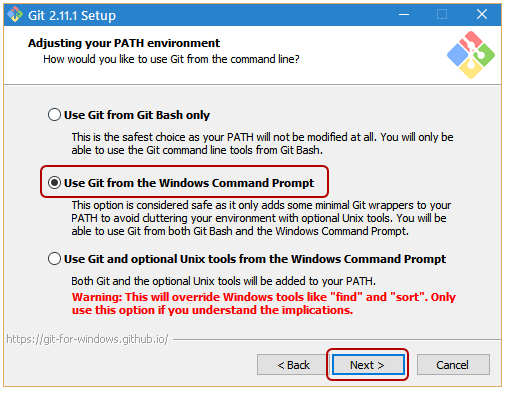
2.5. Setting Windows environment variables
This is the setting of the Windows environment variable PATH . Setting environment variables makes the Git command available at the Windows command prompt.
– [Use Git Bash only] : Nothing is set in the
Windows environment variable ” PATH “.
* Select this if you want to execute Git commands only with “Git Bash” to be installed.
– [Run Git from the Windows Command Prompt] : Add C: \ Program Files \ Git \ cmd to the
Windows environment variable ” PATH “.
* Select this to execute the Git command from the Windows command prompt.
– [Run Git and included Unix tools from the Windows Command Prompt] : C: \ Program Files \ Git \ cmd, C: \ Program Files \ Git \ mingw64 \ bin, C: \ Program Files in the
Windows environment variable ” PATH ” Add \ Git \ usr \ bin. * Select this to execute Unix-like commands in addition to the Windows command prompt.
This time I chose the middle.
● Git 2.11.1 setup (Adjusting your PATH environment)
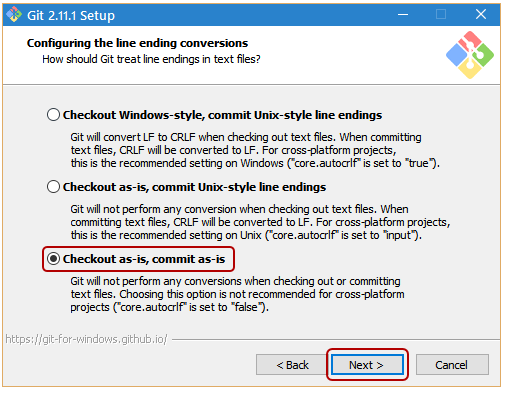
2.6. Setting line feed options
Line feed options for checking in and out of Git repositories. For line breaks , select ” Checkout as-is, commit as-is “, which is a setting that does not convert on the Git side .
● Git 2.11.1 setup (Configuring the line ending conversions)
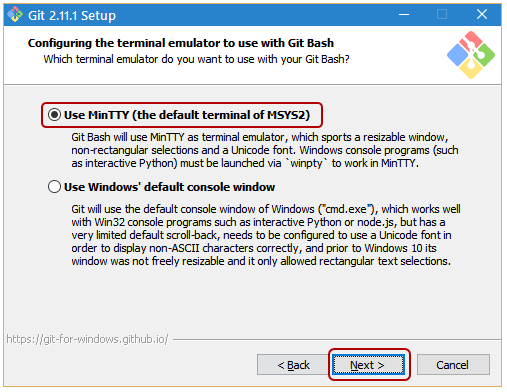
2.7. Git Bash settings
This is the setting of the terminal emulator of ” Git Bash “. A “terminal emulator” is a tool for using commands. The default setting is to use [MinTTY]. If you want to use the standard Windows console, select “Use Windows’ default console window”. This time , select ” Use MinTTY (the default terminal of MSYS2) ” and click the “Next” button .
● Git 2.11.1 setup (Configring the terminal emilator to use with Git Bash)
2.8. Git Other settings
For other option settings , check ” Enable file system caching ” and ” Enable Git Credential Manager ” and click the “Next” button .
● Git 2.11.1 setup (Configuring extra options)

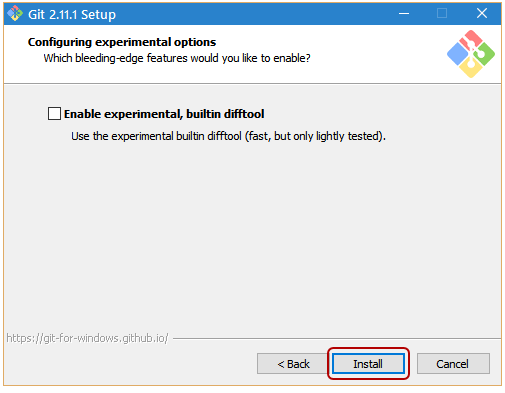
2.9. Difftool settings
If you check ” Enable experimental, builtin difftool “, you can use the file comparison tool diff built in Git, but the operation is not guaranteed because it has not been officially released. We recommend that you use the traditional method, which allows you to call the “diff” command from a perl script. Do not check this time, click the “Install” button to start the installation.
● Git 2.11.1 setup (Configuring experimental options)
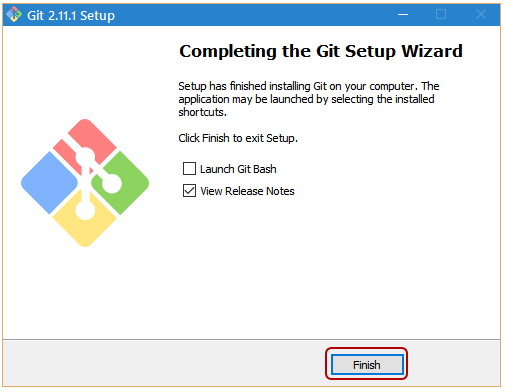
The installation completion window ( Completing the Git Setup Wizard ) is displayed. “View Release Notes” is checked. When the installation is complete, the release notes will be displayed, but if you do not need to confirm it, uncheck it and click the “Finish” button .
● Git 2.11.1 setup (Completing the Git Setup Wizard)
For details on how to use Git, please check the related documents.
[