
“GitHub” is a web service for managing source code in software development projects. Learn how to create a “Github” account and create your first remote repository .
Related article: How to install Git on Windows
Related article: How to use Git for Windows-Preparation-
Related article: Introduction to GitHub-How to create an account-
table of contents
1. What is “GitHub”?
2. How to create a “GitHub” account
2.1. Go to “GitHub” and enter your account information
2.2. Select a “Github” plan (free / paid)
2.3. Check emails from “GitHub”
3. How to create a remote repository on “GitHub”
1. What is “GitHub”?

“GitHub” is a web service that allows you to share source code control for software development projects using the version control system “Git” . To use “GitHub” , you need to create an account. You can use it for free, but basically the source code will be open to the public. If you want to keep it private, you will be charged. Send and receive the “local repository” created by “Git” in the local environment and the remote repository of “GitHub” to manage the version of the source code. In this column, I will explain how to register an account on “GitHub” and how to use it.
2. How to create a “GitHub” account
2.1. Go to GitHub and enter your account information
First, access the official website of “GitHub” ( https://github.com/ ) and create an account.
● GitHub official website ” https://github.com/ “
Open the Github official website and
“Username: Pick a username”
“Email: Your email address”
“Password: Create a password”
Enter the. Please create a password with at least 7 characters.
” Sign up for GitHub “
Click to proceed to the next step.
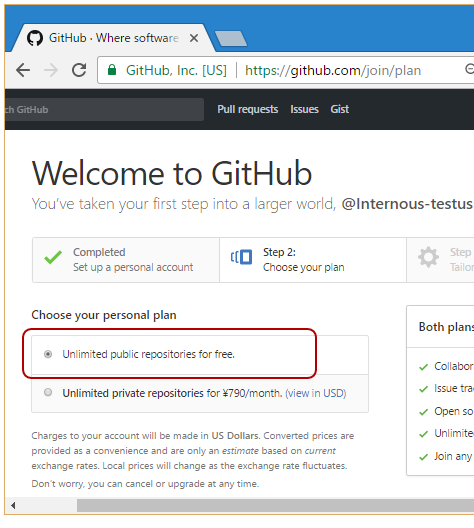
2.2. Select a “Github” plan (free / paid)
There is no usage fee when the source code is published and used ( public repository ).
” Unlimited public repositories for free. “
Select and click the Continue button.
● Welcome to Github (if free)
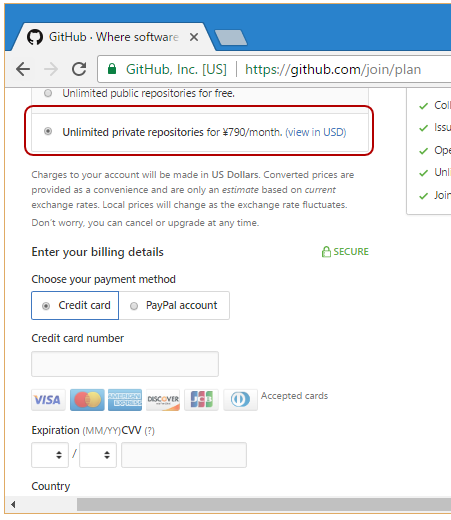
If you use it privately ( private repository ), you will be charged.
” Unlimited private repositories for $ 7 / month. “
Please select. Click ( View in JPY ) to see the Japanese Yen rate. By the way, the rate for March 2017 is “¥ 790 / month”.
If you selected the paid version, select whether to use ” credit card ” or ” PayPal account “, enter the required items such as card information, and click the ” Continue ” button.
● Welcome to Github (if paid)
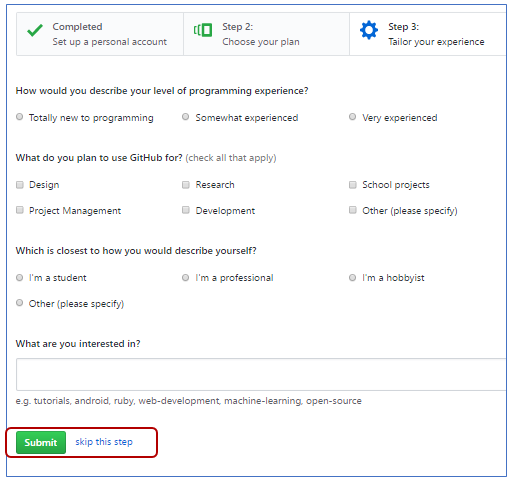
After selecting a plan, you will be prompted with a survey to check your programming level, Github usage, profession, etc., but you can skip this step. If you want to skip the survey check, click ” skip this step “. Of course, you can answer the questionnaire. If you check the questionnaire, click the ” Submit ” button.
● Github survey
2.3. Check emails from “GitHub”
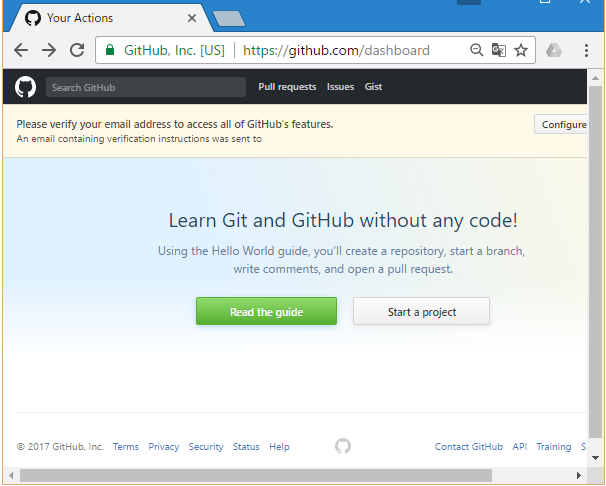
The page will switch after answering or skipping the questionnaire.
” Learn Git and GitHub without any code! “
Message is displayed and the ” Read the guide ” button and ” Start a project ” button appear, but please check the email automatically sent from Github before starting the project on Github.
● Learn Git and GitHub
To the first registered email address
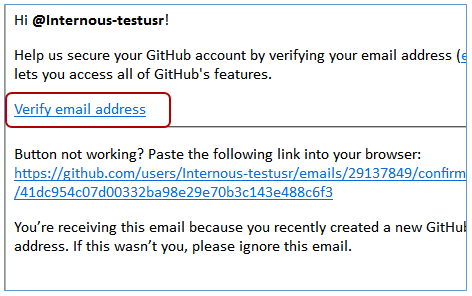
” [GitHub] Please verify your email address. “
You will receive a confirmation email with the title. Open the email and click ” Verify email address ” in the body .
● “Verify email address”
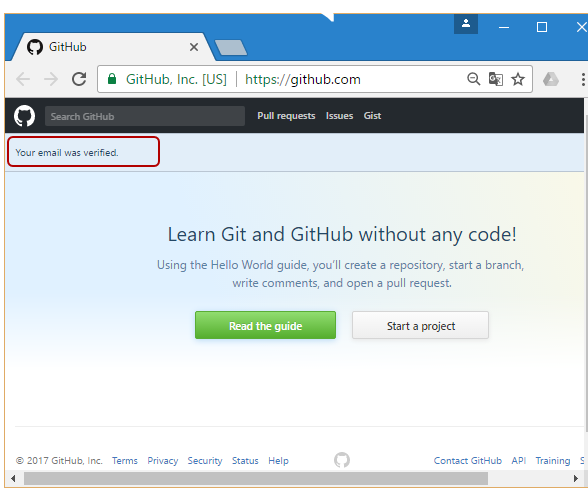
The browser starts up and
” Your email was verified. “
If the characters are displayed in the upper left, the account registration is complete.
An email titled ” Welcome to GitHub! ” Will be sent from “GitHub” .
● Welcome to GitHub!
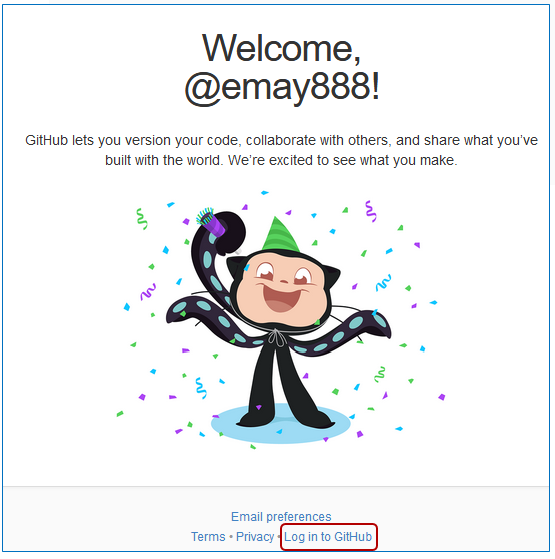
Click “Log in to GitHub” at the bottom of the text to jump to the repository creation page.
3. How to create a remote repository on “GitHub”
Now that the account has been created , let’s create a remote repository immediately .
Click ” Log in to GitHub ” at the bottom of the body of the email titled “Welcome to GitHub!” That you received at the very end of the account creation, and the “GitHub” page will be displayed in your browser.
● Browser display
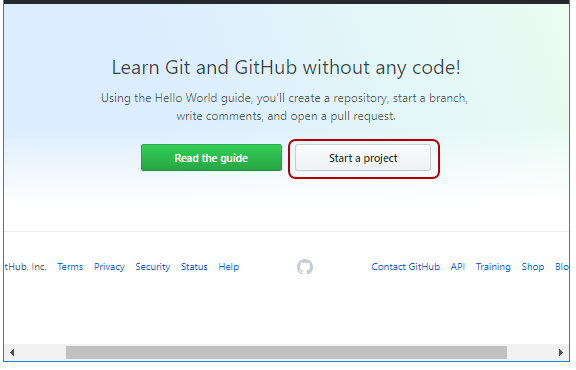
Click Start a project to create a new Remote Repository.
● Browser display
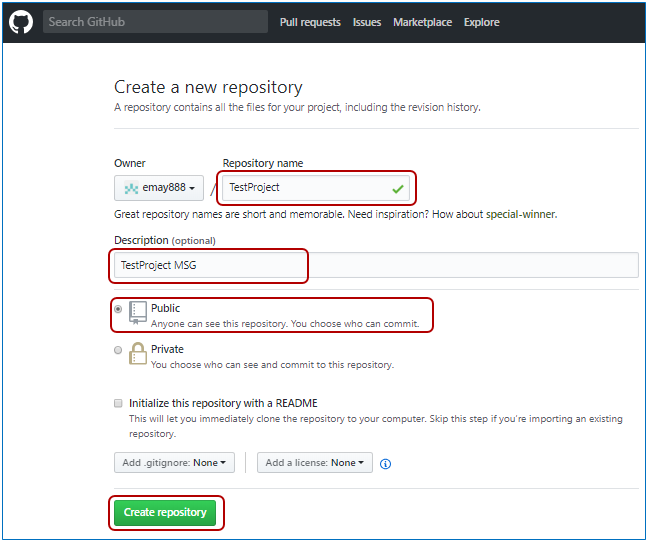
The ” Create a new repository ” page opens. Enter the name of the repository in the ” Repository name ” field, and optionally enter a description in ” Description “. Then select the repository type. Select Public if you created a free account, or select Public or Private if you have a paid account . If you want to create a “README” file when creating the initial repository , check ” Initialize this repository with a README ” and click the ” Create repository ” button.
● Browser display
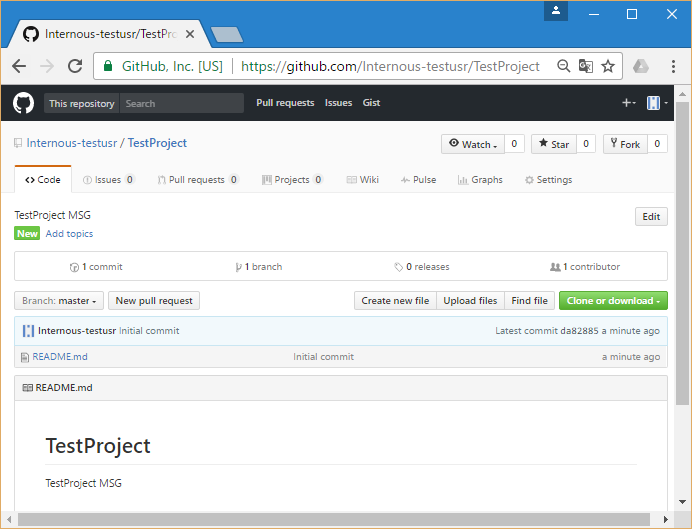
You have created a remote repository and are ready to upload files from your local repository. For details on how to use Github , refer to related articles such as ” GitHub-How to clone a remote repository locally with the” clone “command” .![]()
